Friday, August 5, 2011

Not quite what I had in mind

When I got the job, I imagined it was because of my financial acumen and renowned analytical skills.


It turns out it was because I had room in my house for the chair delivery from Staples.

Wednesday, August 3, 2011

I like my fruit tart

Ever since I was a kid, I've liked my fruit tart.  As in really super sour.

There we would be, in front of a pile of fresh apricots at the market.   "Apricots!!  My favorite*!!" I would say, squirming in anticipation. My mom would select a handful, carefully choosing the best of the bunch.  The flesh would be a magnificent orange color, soft and just barely fuzzy.  There was enough give to the touch to know the stone pit was slightly loose, and you could tell by the smell alone that the inside would be juicy and sweet and perfectly ripe.  She knew how to pick fruit, my mom did, and she was passing this important knowledge down to her daughter.  "Try this," she'd say.


I'd wrinkle up my whole face and frown. "Mom! You know better!"

Mom would sigh and start picking through the pile again, this time looking for the ones that were hard as rocks. Still orange, so they tasted like an apricot, but with none of that sun-kissed lush sweetness so beloved by normal people.  "It is hard to find the good ones," I'd say happily, falling in right beside her and reaching for an acidic little nugget.  "Yes, it is," she'd agree.  Eventually she'd just hand me the bag and move on to get lettuce for the guinea pigs**.

Ditto with the the nectarines. And the plums. Especially the plums.  If I didn't hear a satisfying, apple-like crunch and feel my entire mouth pucker up when I bit into a piece of stone fruit, I was sorely disappointed  On the other hand, eating a crispy, tart, nearly-but-not-actually ripe peach could (and still does) make my day, and I ate myself silly every summer.

The whole family eventually started to get into the swing of things.  My little sister would run up to me with a pear,  "Try this one! It feels like metal!"  My mom waited almost eagerly for my stomach to sieze up from all of the acid (which it did, regularly) so she could say, "I told you so!" But my dad, god love him, actually ate that sour fruit right along with me.

He likes his tart, too.

Fresh Stone Fruit Tart
I made this with some gorgeous pluots I got at the farmers' market.  The original recipe (from Ina Garten) used plums, and I bet subbing in peaches or nectarines would be fantastic, too.  However you go on the fruit side of things, the tart part could not be easier.  The dough forms a rich shortbread cookie crust and a delectable buttery topping at the same time, and the fruit in between is straight up summertime.  This is a great way to use up that icky ripe, very flavorful, sweet fruit.  Save the nice, crunchy sour fruit to eat while you're waiting for this to bake.

2 1/2 c., plus 2 Tbs., flour
1 c. finely chopped pecans
1 c. brown sugar, packed
1 c. (2 sticks) butter, diced
1 egg yolk
1 tsp. vanilla
2 lbs. plums, pluots, nectarines or apricots, sliced into small wedges
About 1/3 c. sugar, depending on the sweetness of your fruit
Splash of almond extract

Combine flour, pecans, and brown sugar in the bowl of a food processor, and run for about 30 seconds to make sure ingredients are well blended and the nuts are finely chopped.  Add butter and pulse until mixture resembles coarse crumbs.  Add egg yolk and vanilla, and process until ingredients come together and the mixture looks similar to cookie dough.


Pre heat oven to 375.  Press 1 1/2 c. of the dough over the bottom and sides of a 9 inch tart pan with removable sides.  Refrigerate for at least an hour, or place into the freezer for a few minutes.  


In a medium sized bowl, combine the fruit with the sugar and almond extract.  Allow to sit for 15 minutes or so. Working in concentric circles, arrange fruit in a pattern on the tart shell.   Crumble the remaining dough on top.


Bake for 10 minutes, then lower the oven temperature to 325.  Bake for an additional 25-35 minutes, or until topping is deep golden brown and you can see some of the fruit juices bubbling up from the tart.

Cool for a few minutes, then carefully remove sides from tart pan and place tart on a flat plate.  Serve warm or at room temperature.  Amazing with vanilla ice cream or fresh whipped cream***.


Click to print this recipe!

* My favorite at that specific moment in time.  The day before I would have inhaled a couple of pounds of fresh cherries, swearing eternal allegiance, and five minutes after the apricot incident I'd go on and on about a particularly great batch of blueberries I'd found.
** Who are, pretty much, the opposite of picky.  The lettuce could practically have rotted and they'd still be in ecstasy.  She loved buying produce for the guinea pigs.
*** If you are feeling truly decadent, throw on some warm brown sugar butterscotch sauce, too.  Why not? It's fruit.  It's good for you.  That's what my mom always told me.

Monday, August 1, 2011

I've been a little busy

Things I did last week:

Baked cookies.
Had friends over for dinner.
Had friends over for brunch.
Drove the kids around.
Sat at the vet with my injured dog.
Went running and hated it.
Played Mah jong at the beach.
Saw Captain America*.
Went back and forth on legal documents with people in China, Texas, San Francisco and New York.
Opened up a corporate bank account**.
Made an exciting journal entry in Quickbooks:  Credit cash, debit equity.
Signed a lease on office space.
Completed an application for D&O, employee practice, liability and umbrella policies.
Priced out health plans and chose a payroll provider.
Received proposals for setting up a 401K and leasing a copier.  (A copier? Cool!)

Yep.  As of last Thursday, a great idea in a friend's head is now a real company with solid financing, and I now have a real, paying, J-O-B***!

The door to the new office.  And my new life!
Holy #%/@!

To celebrate, I baked****.

Life Changing Butterscotch Blondies
I had these at a recent book group meeting, and fell completely in love. They are so rich, I thought of them immediately when it came to an appropriate homage to funding coming in.  I took the original a step further and browned the butter first, then threw in chocolate chips for good measure.  The result is exactly what a great blondie should be...sweet, chewy, buttery and full of caramel flavor, with the perfect hit of salt to balance everything out.  As they bake, this smooth little crust forms on top that just melts in your mouth.  Awe-SOME! The recipe, from Clementine, was reprinted in the LA Times Culinary SOS column, and generously emailed to me by Maggie, one of our hostesses for that meeting.  The book was The Immortal Life of Henrietta Lacks, which had no butterscotch blondies in it, but was nonetheless fascinating.  To hear the story, listen to this very cool podcast about Henrietta from Radiolab, one of my favorite shows on NPR.

1 3/4 c. flour
2 1/2 tsp. baking powder
2 tsp. salt
10 Tbs. (1 1/4 sticks) butter
2 1/4 c. brown sugar
1 tsp. vanilla
2 eggs
1 1/4 c. chopped toasted walnuts or
1 1/4 c. semi sweet chocolate chips

Butter a 13x9 pan and preheat oven to 325.

In a small bowl, whisk flour, baking powder and salt together, and set aside.


Place butter in a small saucepan over medium heat.  After the butter melts, continue cooking for 5-8 minutes, stirring frequently.  It may foam up, which is fine.  Watch carefully, as your goal is to see the milk solids and salt in the butter begin to turn brown,  but you don't want to have them burn.  If they do, the butter will have a very bitter taste.  When the butter is a light tan/golden color and begins to smell toasty, immediately remove from heat.


Place brown sugar into a large mixing bowl, then pour in the browned butter and vanilla.  Mix on medium speed with an electric mixer until combined.  Blend in the eggs. Add the dry ingredients, mixing on low speed until dough is smooth and a little bit shiny.   Fold in the nuts/chocolate chips by hand.


Spread dough evenly into prepared pan.  Bake for 25 minutes, or until top is puffed, smooth, and light brown.   When you remove the pan from the oven, the top may collapse.  This is perfectly fine...it means your blondies will be dense and chewy, just as they should be.


Cool for at least 20 minutes, then serve.


Click to print this recipe!

* Don't rush out.  It was just OK.
** When I went to the bank after our financing closed, the manager greeted me with a big smile and said, "Your wire came in today.  Would you like a cookie?"  I declined.  I had to go home and bake for the "We got funded!" company BBQ.  I know I'm with the right team at the new job.  The BBQ menu featured marinated skirt steak on fresh naan, with arugula and brie.
*** It's a start up. I'm the CFO.  My average week will be looking a little different very soon.  New blog tag: work!
**** Mostly in celebration.  Partially from nerves over the impending life changes that are coming my way.

Sunday, July 31, 2011

How do you like your eggs?

It's kind of a personal question.  


But OK, I'll confess.


I like mine baked.


With bacon*.


Preferably Bubba's bacon**.


Lots of Bubba's bacon.
How do you like your eggs?

Mark's Baked Eggs with Caramelized Onions and Cream
These, from a guy who has perfected the art of brunch.

Olive oil
1-2 red onions, thinly sliced crosswise (so there are rings, like a tree trunk)
kosher salt
freshly ground black pepper
sugar
thyme

Butter
1 dozen eggs
1/2 pint heavy cream
generous amount of freshly grated Parmesan cheese

Heat the olive oil in a medium skillet, then add the onions and a generous sprinkling of salt, pepper, sugar and thyme.   Cook slowly, stirring occasionally, over medium low heat until onions are completely soft, deeply golden brown and caramelized.   Set aside.

Preheat oven to 350.  Butter 12 muffin tins or small ramekins.  Divide caramelized onions between the muffin tins.  Pour a little heavy cream into each tin, enough to just barely cover the onions.  Carefully crack an egg into each tin.   Season with salt and freshly ground pepper, then finish with a portion of the grated Parmesan.   Bake for 30 minutes, until set.

The lovely photos of Mark's eggs come courtesy of Lynn over at The Actor's Diet.   I was too busy scarfing my eggs down to get any pics.

Click to print this recipe!

Oven Omelet
From my family's recipe trove (i.e. a scrap of paper I found in a box)

8 eggs
1 c. milk
8 oz (1/2 pkg.) bacon, cooked until crisp, and then crumbled
- and/or -
1/2 c. diced cooked ham, pancetta, sausage, or other tasty protein
1/4 c. chopped green onions
1 c. grated cheddar cheese, or other cheese of your choice
1 tsp. kosher salt
1 tsp. freshly ground pepper


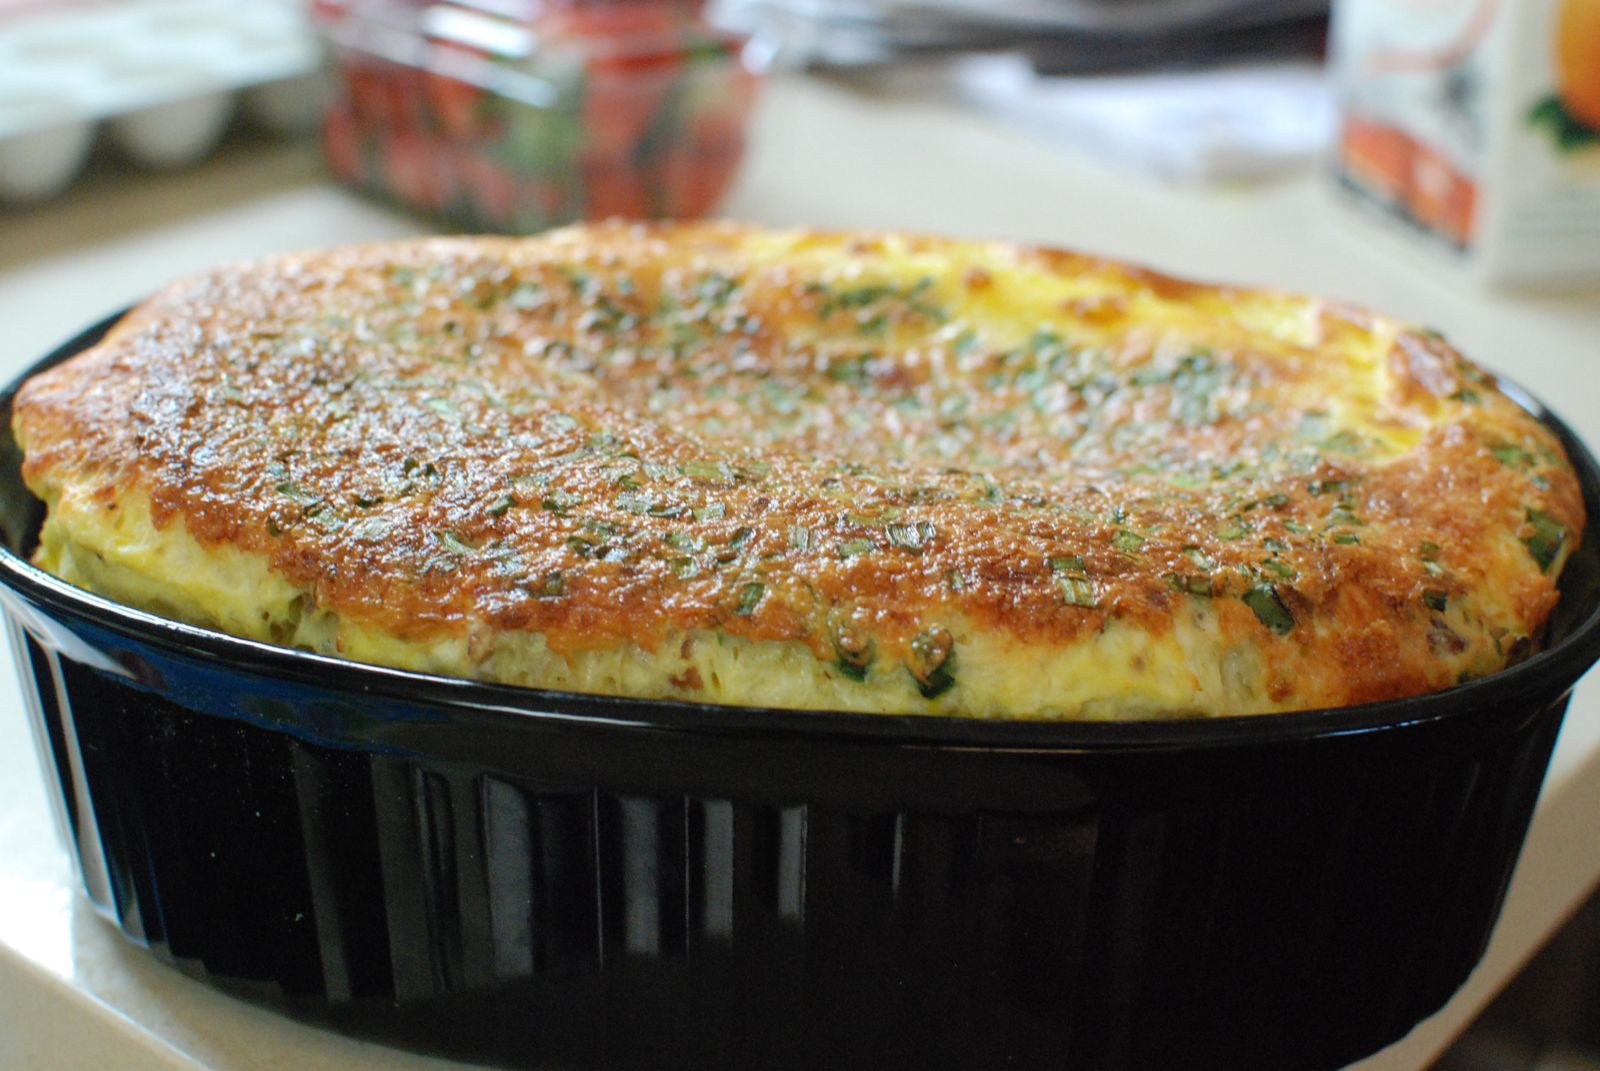
Preheat oven to 350.  Butter an 8 inch square or round deep sided baking dish.  Beat eggs and milk together until light and fluffy, then add remaining ingredients.  In addition to what's listed, you can add chopped mushrooms or other veggies, or try different types of cheeses.  This is my tried and true blend, but go for it! 

NOTE: You can use a larger dish if you are serving a group. Just increase the eggs and milk, using a ratio of 1/4 c. of milk for every 2 additional eggs.  The omelet in the photo was made with 10 eggs and 1 1/4 c. of milk, and served 8 of us.   

Pour mixture into the prepared baking dish.  Bake uncovered for 40-45 minutes, until top is golden and dish is set. Serve immediately!


Click to print this recipe!

* And coffee cake.  The one with the caramel sauce.  If it's not too much trouble.
** Delivered to my door in dry ice, courtesy of the good people at BaconFreak (motto:  Bacon is Meat Candy!), whose introductory Bacon of the Month Club membership has to have been one of the all time greatest gifts I have ever received in my life.  I love you, Marie!

Saturday, July 30, 2011

Maybe I should go to the doctor, too

There's definitely something mis-wired with my brain.


When I saw this new product at Trader Joe's, I didn't think:
"Gee, I bet that would be good in a cup of coffee."

I thought:
"Gee, I bet that would be good on Snickerdoodles."

I am an idiot savant.  It was friggin' great on Snickerdoodles*.


Trader Joe's New Sugar Shaker Snickerdoodles
In addition to the snazzy new flavor, this update to our standard recipe includes the handy "slice and bake" method for making your cookies ahead of time, and baking them fresh when you want them.  Very Trader Joe's of me.

For the cookies:
1/2 c. (1 stick) butter, softened
1/4 c. cream cheese, softened
1/4 c. shortening
1 1/2 c. sugar
2 eggs
1 tsp. vanilla
2 1/2 c. flour
2 tsp. cream of tartar
1/2 tsp. baking soda
1/2 tsp. salt

For the coating:
Generous 1 Tbs. of Trader Joe's new Coffee/Chocolate/Sugar shaker mix, ground
1 Tbs. cinnamon
1/3 c. sugar

In a large mixing bowl, beat together the butter, cream cheese and shortening with an electric mixer until light and fluffy.   Add sugar, and mix well to combine.  Add eggs and vanilla, and mix again.  In a smaller bowl, whisk together the flour, cream of tartar, baking soda and salt, then add slowly to the butter mixture, blending until combined.

Spoon 1/2 of dough out onto a sheet of wax paper, and form into a log, about 2 inches in diameter.   Dough will be soft, so work gently.  Roll the log up into the paper, then repeat with remaining dough.  Twist ends of paper to seal, then refrigerate for at least 1 hour, or as long as a few days.

Preheat oven to 375.   Combine coating ingredients in a small bowl with a spoon or small whisk, and set aside.  Remove dough from fridge, and slice into rounds, just under 1/2 inch thick.   Toss each round of dough into the coating mixture, turning over to make sure all sides are well covered, and pressing gently with your fingers if you need to help the sugar stick.  Place coated cookies about 2 inches apart on a parchment or silpat covered baking sheet.

Bake for 8-10 minutes, or until edges are just turning light golden brown. Do not over bake!  Remove to cooling rack, and serve.

Click to print this recipe!

* Or sprinkled on anything from vanilla ice cream to buttered toast.  It was also a big hit with the bread baking class.

Friday, July 29, 2011

I know why the caged dog sighs

He's not allowed to move, except when absolutely necessary.

His closest companion is an ice pack.

And it takes an entourage to go out and take a leak.


Our furry patient, patiently waiting for his knees to work again.

It's gonna be a while, big guy.  We're all sighing, too.

Thursday, July 28, 2011

Next I'll find out it's a cinch to fix the cable modem

There are certain things I've always assumed are best left to the experts:

Snake charming.
Nuclear fission.
Anything in a Cirque du Soleil show.
Changing the oil in my car.
Deep sea diving.
Analyzing James Joyce novels.
Electrical wiring.
Zumba.
Making an entire dinosaur from a fossilized bug trapped in amber.

The list goes on.

But as of now, it is one item shorter.

Pita Bread.


Do-it-yourself Pita Bread
From the very aptly named How to Cook Everything, by Mark Bittman.  Not only is this ridiculously easy to do, but the bread tastes just like the pita the experts make, but better, because it's fresh and piping hot from your very own oven.

3 1/2 c. bread or all purpose flour, part whole wheat if desired
2 tsp. salt
1 1/2 tsp. quick rise yeast
1 Tbs. olive oil, plus more for coating bowl
1 c. lukewarm water, plus more as needed

Combine flour, salt and yeast in the bowl of a food processor, and pulse to combine.  Add oil to water in a liquid measuring cup, then, with the machine running, pour the liquid ingredients into the food processor through the tube at the top.  Process for about 30 seconds.  The dough should be in a well-defined, barely sticky, easy to handle ball. If it's too dry, add water, 1 Tbs. at a time, and process until the ball of dough comes together.

Turn dough out onto a flour covered surface, and knead for about a minute by hand, until completely smooth.  The dough will feel very dense and heavy. That's OK.


Lightly coat a large mixing bowl with more olive oil, then place the dough in the bowl.  Cover with a slightly damp towel, and allow to rise in a warm place until doubled in size, about 2 hours.  Remove from the bowl, punch down a little, then divide into 6-12 equal pieces, depending on what size pitas you want.   Roll each piece into a smooth ball, then set aside, making sure each ball is lightly floured.  Cover pieces with damp towel again while you preheat the oven.

Set oven to 500.  If you have a baking stone, place it in the oven.  If not, place a baking sheet in the oven to get hot while the oven heats up.


Roll each piece of dough out into a circle, about 6 to 8 inches in diameter, and perhaps 1/3 of an inch thick. Lightly flour and cover the resulting discs of dough, but do not stack them on top of each other.


When the oven is hot, place as many of the pita rounds as you can fit comfortably on the baking stone or cookie sheets.   In 2 or 3 minutes, the dough will puff up, forming the nifty little "pocket" in your pita bread.  Once puffed, remove from the oven and repeat with remaining dough.


Click to print this recipe!

ShareThis